
Settings and your account
Settings is five tabs, and each one answers a different question about your account rather than a different feature of the product.
| Tab | The question it answers |
|---|---|
| Account | Who am I |
| Security | What protects it |
| Connections | What is it linked to |
| Developer | What can automate it |
| Billing | What it costs |
They are in that order across the top of the page and they load one at a time, so a tab you never open never fetches anything.
Three tabs used to exist on their own and were folded into these five, and their
addresses still work: #settings/handle lands on Account, #settings/devices
lands on Security, and #settings/control-surface lands on Developer.
One more moved out of Settings entirely. #settings/appearance now redirects to
the overlay theme editor in Alerts and Overlays, because two editors over one
theme store is a disagreement waiting to happen. See
Widgets, media and themes.
Account
Section titled “Account”Four cards, and the first two are the ordinary ones.
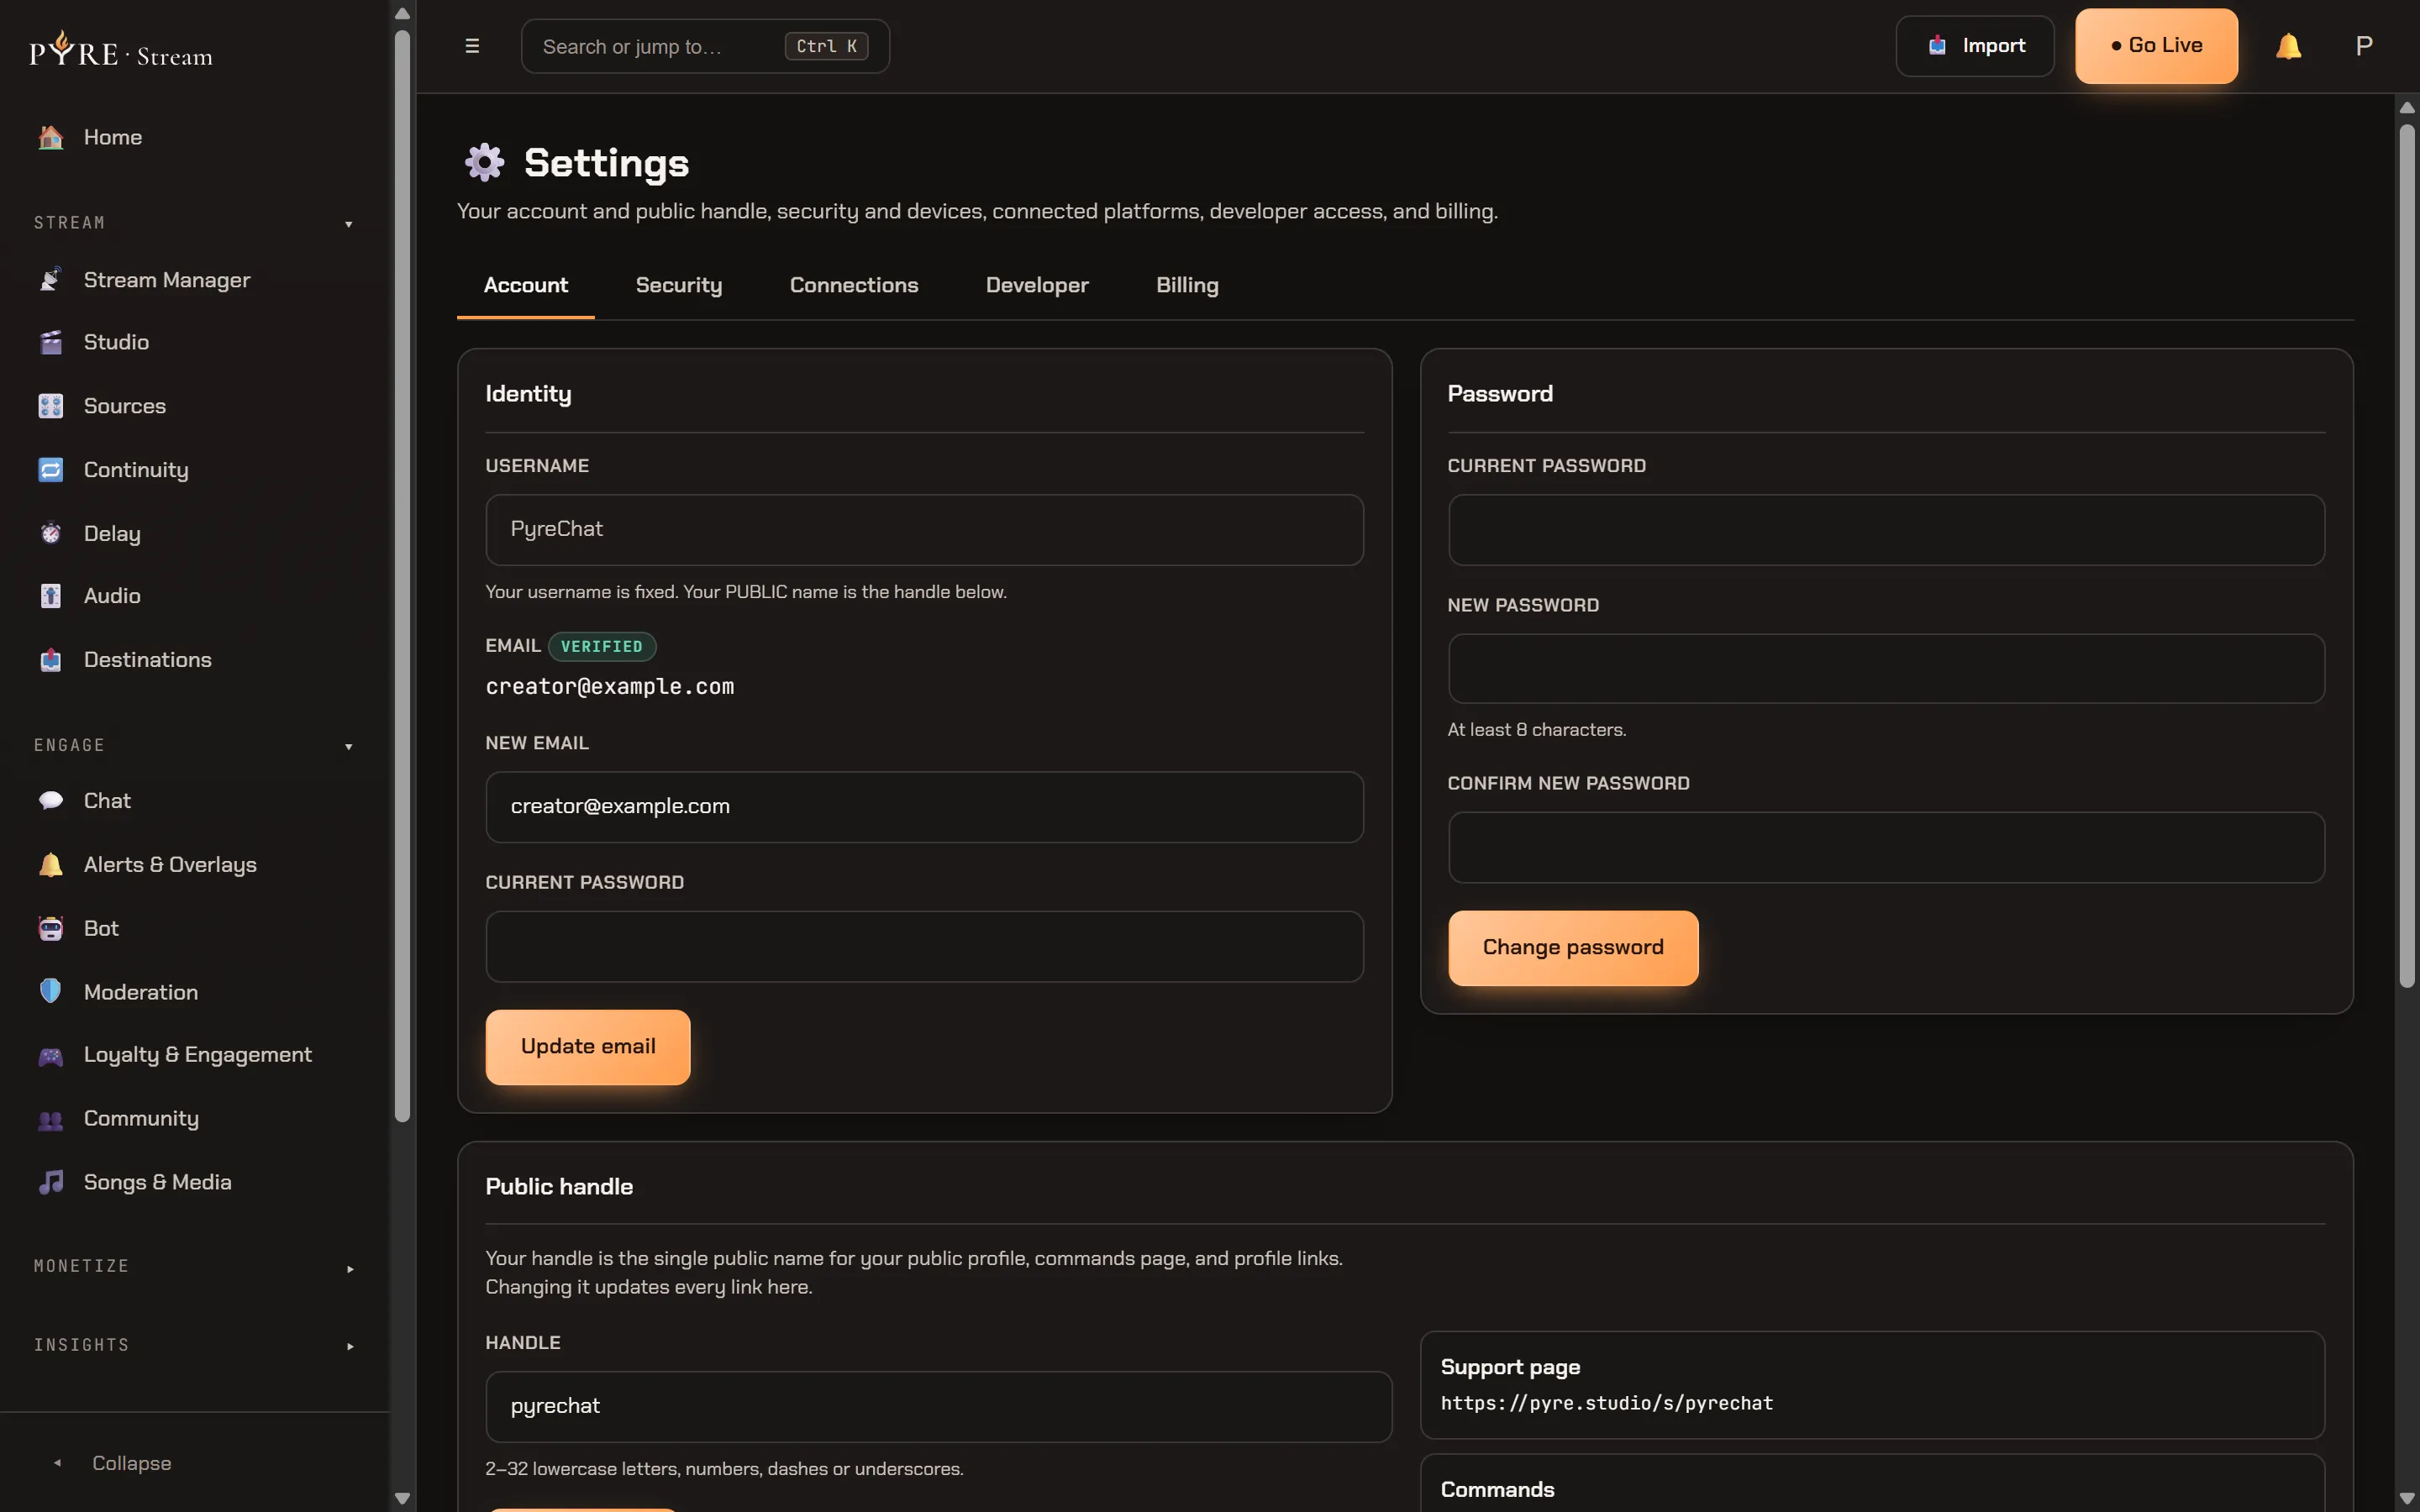
Identity holds your Username, which is deliberately a read only box: the
help under it says Your username is fixed. Your PUBLIC name is the handle below.
It also holds your Email, with a verification badge beside it and a resend
link when it is unverified. Changing your email takes the new address and your
current password, and the reply tells you to check your inbox, because the new
address is not verified by the act of typing it.
Password is a plain three field change form: current, new (at least 8 characters) and a confirmation. The confirmation is checked in your browser only. The API takes two fields, not three, and the third exists because a typo in a box you cannot read locks you out of your own account.
Public handle is the one that matters beyond this page.
-
Type a handle. The rule is stated under the field:
2–32 lowercase letters, numbers, dashes or underscores.Anything else you type is dropped as you type it rather than rejected on save. -
Watch the availability line. It checks against the server as you type, so a handle somebody already holds is refused here rather than at save time.
-
Press Save handle. Beside the form is the list of addresses your handle builds, your Support page and your Commands page, and they are rewritten the moment the handle changes.
Your handle is edited here and nowhere else. It is the address of your public page, so Your public page links back to this tab rather than offering a second field of its own.
Danger zone is the fourth card, and it does what it says:
Deleting your account is permanent. Your destinations, overlays, themes, commands, loyalty points, chat history and connected platforms are removed with it. There is no undo and no export afterwards.
The delete button stays disabled until you type your handle exactly and give your
password, which is the point of asking for both.
Security
Section titled “Security”Two-factor authentication is an authenticator app, set up in one pass. Press
Set up 2FA, scan the QR that appears, and enter the six digit code to confirm.
Under the QR is a field labelled Or enter this secret manually, which is the same
secret in text for a device that cannot scan. Turning 2FA back off asks for your
password.
Active sessions lists every session on your account with the browser or app it
is running in, its IP and when it signed in. The one you are reading this on wears
a This device chip and has no Revoke button, because signing yourself out of
the page you are standing on is not a feature. Revoking one names the device in
the confirmation. Sign out other sessions at the top of the card is the bulk
version, and it confirms too:
Sign out every other session? Every device except this one is signed out immediately and cannot be restored.
Pair a device and Paired devices are the phone half. Pairing mints a link,
renders it as a QR and keeps the copyable URL underneath for a device with no
camera. That QR is a live passwordless sign in and deserves the full treatment,
which it gets in Sources and devices. Paired rows
carry Rename and Remove, and Remove is the real one:
Remove this device? It loses access to your account and has to be paired again.
A paired device is something that can act as you, which is why it is filed under
Security rather than under a devices tab of its own.
Age verification is the last card, and it is honest about being a thin one. It shows a status and which provider produced it, for 18+ surfaces under regimes like the UK Online Safety Act and US state laws. Verification runs through a pluggable provider that holds the documents, and Pyre stores only the outcome, never a date of birth, a document or an image. Per jurisdiction enforcement is off by default and is a product and legal decision rather than a switch you are given.
Connections
Section titled “Connections”Four cards, one per platform, always all four: Twitch, YouTube, Kick and TikTok. A platform you have not connected still gets a card, so the set never changes shape. TikTok is connected differently from the other three and its card never offers a Connect button it cannot honour.
Three different things in Pyre are called something close to “connections”, and they are genuinely different:
- Settings ▸ Connections is your platform accounts. Connecting one here is the sign in that unlocks that platform everywhere else in Pyre.
- Destinations is where your video goes. Signing in on this tab is not the same act as enabling a destination, and Pyre never auto enables one for you.
- Connections in Pyre.Bot is about getting the bot into your chat, enabling it and getting it modded.
A connected Twitch that is missing the streaming scope is not reported as connected. It gets a warning and a reconnect link instead, because it is one reconnect away from every stream key read failing.
Disconnecting is more than hiding a card, and the confirmation says so:
Disconnect twitch? Live chat for that channel stops (reading, sending and the bot) until you connect it again.
Developer
Section titled “Developer”Two cards, both for the public API.
API Tokens creates a bearer token for /api/v1. Give it a name, tick the
scopes it needs, and press Create token. There are four scopes and they are
listed by their real ids:
| Scope | What it opens |
|---|---|
events:read | GET /events/recent and the read WebSocket |
channel:read | GET /channel/status |
webhooks:write | Creating and deleting webhooks |
actions:write | POST /actions/* |
events:read is ticked for you; the rest are not. Tick only what the integration
actually needs, because a token is a password with your account’s name on it and
the scopes are the only thing narrowing what it can do with it. The new token
appears once, in a copy field, over the line
This token is shown once and cannot be retrieved again. Store it somewhere safe.
The list below shows every token with its scopes, when it was created and when it
was last used, and a Revoke button. A revoked token stays in the list, marked
revoked, so you can see what you turned off.
Webhooks is the outbound half. Give it a Delivery URL and an Event
filter, which defaults to * (all events). Creating one reveals a signing
secret, once, on the same terms:
This signing secret is shown once. Use it to verify the HMAC signature on incoming deliveries.
Verify that signature on your end. A delivery URL that accepts anything that
posts to it is not a webhook, it is an open door. Rows show the URL, whether the
hook is enabled, its filter and its creation time, with Delete beside them.
Billing
Section titled “Billing”Billing opens your account’s billing page.